
Travel photography captures the essence of your adventures, but raw images often need enhancements to truly shine. Learning how to edit travel photos like a pro can make your pictures more vibrant, engaging, and share-worthy. Whether you’re editing for social media, a personal blog, or a professional portfolio, this guide will walk you through essential editing techniques to enhance your travel shots.
1. Choosing the Right Editing Software
Before you begin editing, selecting the right software is crucial. Here are some popular options:
- Adobe Lightroom: Ideal for professional-level photo editing with powerful color correction and batch processing features.
- Adobe Photoshop: Best for detailed retouching and complex edits.
- Snapseed: A free and intuitive mobile app for quick edits.
- VSCO: Popular for stylish filters and film-like aesthetics.
- Luminar Neo: AI-powered software that enhances travel photos effortlessly.

Each of these programs offers different tools, so choose one based on your editing needs and skill level.
2. Organizing and Importing Photos
Before editing, organize your images for a streamlined workflow. Steps to follow:
- Transfer photos to your computer or cloud storage for easy access.
- Create folders based on location or date to keep images organized.
- Use a RAW format if possible, as it retains more image details than JPEG.
- Cull your shots by selecting only the best images for editing to save time.
3. Adjusting Basic Settings
Start with fundamental adjustments to improve overall quality:
a) Exposure & Brightness
If your image is too dark or bright, adjust the exposure and brightness sliders to achieve balanced lighting.
b) Contrast
Increasing contrast enhances the difference between highlights and shadows, making the image more dynamic.
c) White Balance
Correct color temperature by adjusting the white balance to make your image appear warmer or cooler. A proper balance ensures natural colors.
d) Cropping & Straightening
Use the crop tool to remove distractions and apply the rule of thirds for better composition. Straighten the image if the horizon appears tilted.
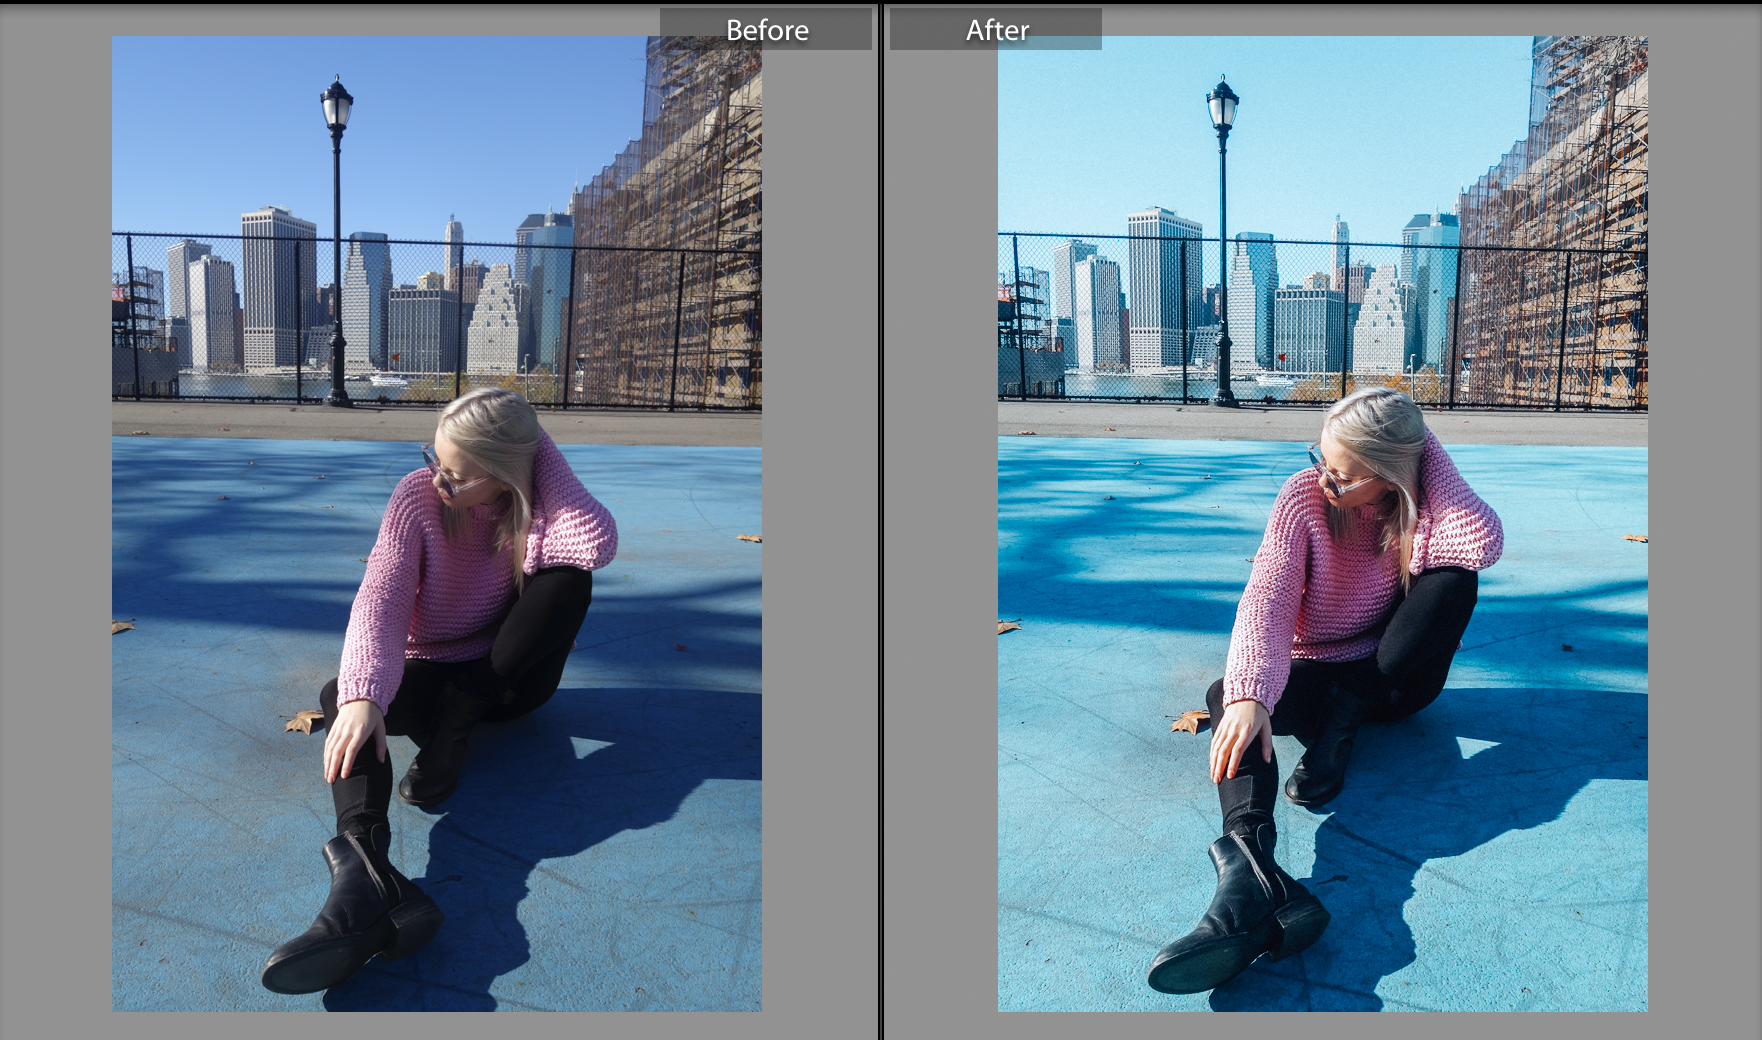
4. Enhancing Colors
Travel photos often benefit from vibrant colors that reflect the beauty of landscapes and cityscapes. Here’s how to enhance them:
a) Saturation & Vibrance
- Saturation affects all colors equally, making them more intense.
- Vibrance selectively enhances muted colors without oversaturating the entire image.
b) HSL Adjustments
Use the Hue, Saturation, and Luminance (HSL) panel to fine-tune individual colors. For example, making blues deeper in sky photos or greens more vibrant in nature shots.
c) Color Grading
Professional editors use color grading to add stylistic tones. Experiment with warm golden tones for sunsets or cool blue hues for ocean scenes.
5. Enhancing Sharpness & Clarity
To ensure your photos look crisp and professional:
- Increase clarity to make textures stand out.
- Use the sharpening tool carefully to enhance details without introducing noise.
- Apply dehaze to remove atmospheric fog in landscape shots.

6. Removing Distractions and Unwanted Objects
Unwanted objects like power lines, tourists, or blemishes can detract from a great travel photo. Use the following tools:
- Spot Healing Brush (Photoshop & Lightroom): Removes small distractions seamlessly.
- Clone Stamp Tool: Duplicates surrounding pixels to erase objects.
- Content-Aware Fill: An AI-powered feature in Photoshop that intelligently replaces selected areas.
7. Applying Filters & Presets
Filters and presets offer a quick way to create a consistent style:
- Presets in Lightroom: Save time by applying a pre-configured look.
- VSCO Filters: Achieve a film-like aesthetic with one tap.
- Custom Adjustments: Modify presets to suit different lighting conditions.
8. Advanced Editing Techniques
a) HDR Editing
High Dynamic Range (HDR) editing blends multiple exposures to capture details in both shadows and highlights. This is useful for:
- Sunrise and sunset shots
- Cityscapes with bright lights
- Dramatic landscapes
b) Dodge & Burn
Dodge (lighten) and burn (darken) tools help emphasize specific areas. For example, brightening faces in portraits or darkening the background to create depth.
c) Focus Stacking
If parts of your image appear out of focus, focus stacking (combining multiple shots with different focus points) ensures clarity throughout.
9. Exporting for Different Platforms
Once you’re satisfied with your edits, export your images for their intended use:
- For social media: Resize images to fit platform requirements (e.g., Instagram: 1080×1350 px for portrait images).
- For printing: Save in high resolution (300 DPI) and in TIFF or PNG format for the best quality.
- For web use: Optimize file size without losing quality using JPEG with around 80% compression.
10. Developing Your Signature Editing Style
Editing travel photos like a pro goes beyond technical skills—it’s about developing a unique style. Experiment with different edits, create your presets, and refine your approach to make your travel photos instantly recognizable.
Mastering travel photo editing takes practice, but with the right tools and techniques, you can transform ordinary images into stunning masterpieces. Whether you prefer natural edits or dramatic enhancements, following these steps will help you achieve professional-quality results every time. Happy editing!