
A flat tire is one of the most common vehicle-related problems that drivers encounter. Whether you’re commuting to work, going on a road trip, or simply running errands, a flat tire can suddenly leave you stranded. While it may seem intimidating, fixing a flat tire is a skill every driver should have. The good news is that with the right tools and a little know-how, you can easily handle the task yourself. This step-by-step guide will walk you through the entire process of fixing a flat tire safely and efficiently.
Step 1: Gather Your Tools and Materials
Before you start, make sure you have the necessary tools to fix the flat tire. Having everything you need at hand will make the process go smoothly. Here’s what you’ll need:
- Spare Tire: A fully inflated spare tire is essential. Be sure to check the air pressure regularly, even when you don’t need it.
- Car Jack: A hydraulic or scissor jack is required to lift the car off the ground.
- Lug Wrench: A lug wrench is used to remove and tighten the lug nuts that secure the tire to the wheel.
- Wheel Chocks: These are used to prevent the car from rolling when lifted.
- Tire Repair Kit (Optional): If you have a tire repair kit with plugs or a patch, you can use it for temporary fixes.
- Flashlight: A flashlight is handy if you’re working at night or in dimly lit conditions.
- Gloves: Gloves will help protect your hands from dirt and debris.
- Tire Pressure Gauge: You can use a pressure gauge to check the tire pressure once the new tire is installed.
Having these items on hand will make the tire-changing process much easier. If you don’t already have these tools in your vehicle, it’s a good idea to keep them in your trunk at all times.

Step 2: Find a Safe Location
If you’re driving when you notice the flat tire, the first step is to safely pull over. Here are some tips for choosing a safe location:
- Look for a flat surface: Avoid parking on an incline or uneven ground. A flat, stable area will make the process safer and easier.
- Stay off the road: Try to pull over to the side of the road or into a parking lot. If you’re on a busy highway, it’s essential to stay as far away from traffic as possible.
- Turn on Your Hazard Lights: This alerts other drivers to your presence, ensuring your safety while you’re working on the tire.
- Apply the Parking Brake: Always engage the parking brake to prevent the car from rolling.
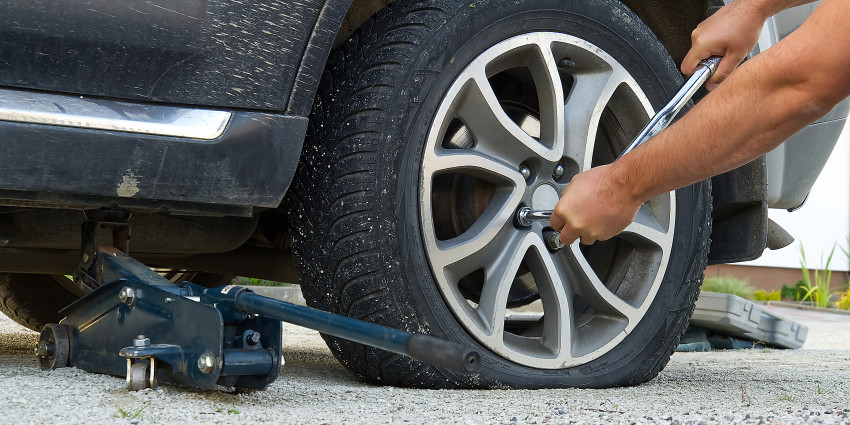
Step 3: Loosen the Lug Nuts
Once you’ve parked the car safely, it’s time to loosen the lug nuts. You may be tempted to start lifting the car immediately, but it’s best to loosen the lug nuts while the car is still on the ground. This prevents the tire from spinning while you’re trying to loosen the nuts. Here’s how to do it:
- Use the Lug Wrench: Fit the lug wrench onto one of the lug nuts and turn it counterclockwise. You may need to use your body weight to apply enough force. If the lug nuts are too tight, you can use your foot for additional leverage.
- Loosen, Don’t Remove: It’s important to only loosen the lug nuts, not to remove them entirely. You’ll want to do this while the car is still on the ground, as it will be harder to turn the nuts once the tire is lifted.
If the lug nuts are difficult to loosen, you can apply some penetrating oil to the threads, let it sit for a few minutes, and try again.
Step 4: Lift the Car with the Jack
Once the lug nuts are loosened, it’s time to lift the car. Here’s how to use the jack correctly:
- Position the Jack: Consult your vehicle’s owner’s manual to locate the recommended jack points. These are typically found near the tires and are designed to bear the weight of the car. Place the jack underneath the vehicle at the specified points.
- Lift the Car: Use the jack to slowly lift the car off the ground. Keep lifting until the flat tire is off the ground by a few inches. You want enough clearance to easily remove and replace the tire.
- Double-Check Stability: Before you proceed, ensure the car is stable on the jack. If the car seems unsteady, lower it and reposition the jack.
Step 5: Remove the Flat Tire
With the car lifted, it’s time to remove the flat tire. Here’s how:
- Finish Loosening the Lug Nuts: Now that the tire is off the ground, finish removing the loosened lug nuts entirely.
- Remove the Flat Tire: Once the lug nuts are off, gently pull the flat tire away from the wheel hub. If it’s stuck, wiggle it a bit or tap it with a rubber mallet to loosen it.
- Set the Flat Tire Aside: Place the flat tire in a safe spot where it won’t roll away.
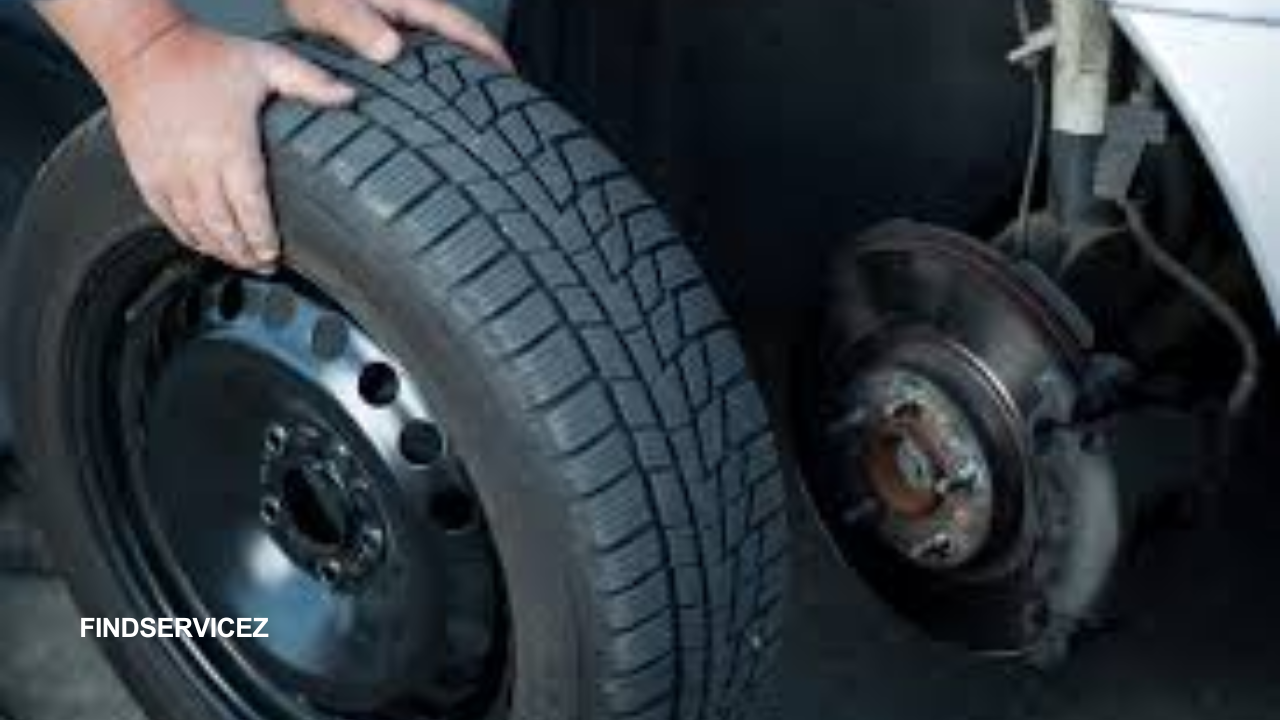
Step 6: Install the Spare Tire
Now it’s time to install the spare tire. Here’s how to do it:
![100+] Flat Tire Picture | Wallpapers.com](https://wallpapers.com/images/hd/flat-tire-picture-84xvd0j37ai0vcym.jpg)
- Align the Spare Tire: Position the spare tire so that the bolt holes line up with the wheel hub. Make sure the tire is facing the right direction (the side with the valve stem should be on the outside).
- Push the Tire onto the Hub: Once the tire is aligned, slide it onto the wheel hub and push it in until it’s firmly in place.
- Hand Tighten the Lug Nuts: Begin threading the lug nuts onto the bolts by hand. Tighten them as much as you can without using the wrench. This ensures the tire is secure before you fully tighten the nuts.
Step 7: Lower the Car and Tighten the Lug Nuts
With the spare tire in place, it’s time to lower the car and tighten the lug nuts. Here’s how:
- Lower the Car: Use the jack to slowly lower the car back to the ground. Once the tire touches the ground, remove the jack from underneath the car.
- Tighten the Lug Nuts: Use the lug wrench to fully tighten the lug nuts in a crisscross pattern. This ensures that the pressure is evenly distributed across the tire.
- Apply the Right Torque: Be careful not to overtighten the lug nuts. If you have a torque wrench, use it to apply the recommended torque setting from your vehicle’s manual. If not, tighten the lug nuts as much as possible without using excessive force.
Step 8: Check the Tire Pressure
After replacing the flat tire, it’s important to check the air pressure in the spare tire to ensure it’s properly inflated. Use a tire pressure gauge to check the pressure, and if needed, use an air compressor to add air until it reaches the recommended PSI (pounds per square inch) listed in your car’s owner’s manual.
Step 9: Clean Up and Store Your Tools
Once the spare tire is securely in place and properly inflated, it’s time to clean up and store your tools:
- Put the Flat Tire in the Trunk: If the flat tire is repairable, you can take it to a tire shop for a repair. If not, you may need to dispose of it.
- Store Your Tools: Place the jack, lug wrench, and any other tools back in their proper storage locations.
- Check the Spare Tire: Before you drive off, check the spare tire again to make sure it’s properly inflated and ready for future use.
Step 10: Drive Safely
Once everything is packed up, you’re ready to hit the road again. However, it’s important to drive cautiously, especially if your spare tire is a “donut” or temporary spare tire. These tires are designed for short-distance use and lower speeds, so avoid driving at high speeds and get your full-size tire repaired or replaced as soon as possible.
Final Thoughts
While dealing with a flat tire may seem like a daunting task, knowing how to fix a flat tire is a valuable skill that every driver should possess. With a little practice, you’ll feel more confident handling flat tires, and it’ll save you time and money in the long run. Always remember to carry the necessary tools, stay safe, and drive cautiously when using a spare tire.
By following these simple steps, you can quickly get back on the road and continue your journey with peace of mind. Keep this guide handy, and you’ll be prepared for anything the road throws your way!